
Friends, in today’s digital age, whether you need to save a slide from an important online meeting, record an error message, or share a meme with friends, taking a screen capture has become a daily necessity. But after the new OS update, many people get confused and go online to search, “How to Take Screenshot in Laptop Windows 11?”
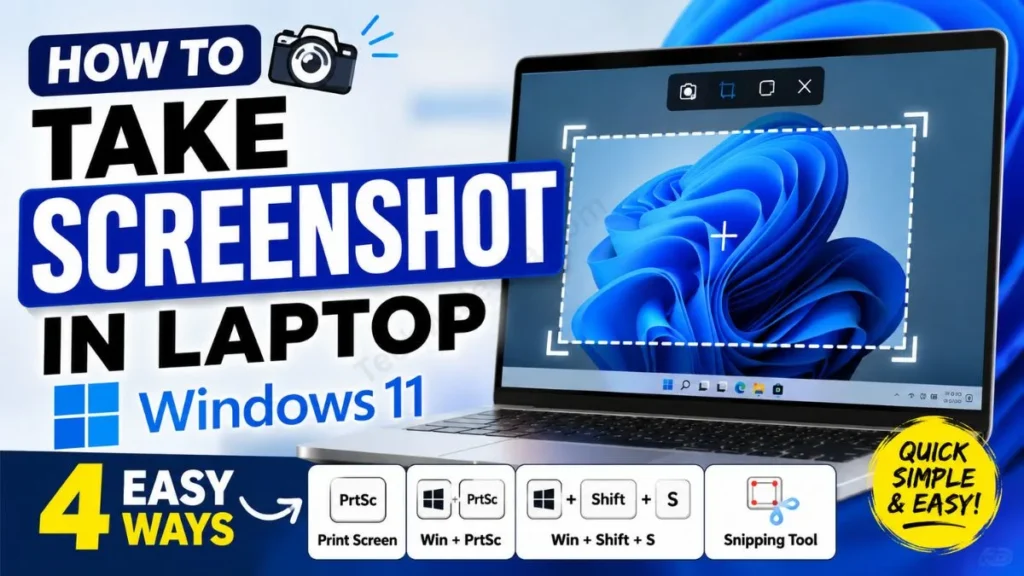
If you’re looking for a quick and straightforward answer, the easiest way to take a screenshot in Windows 11 is to press the ‘PrtScn’ (Print Screen) key on your keyboard. If you want to save the photo directly, press ‘Windows Key + PrtScn’ at the same time. And if you need to take a screenshot of just a partial area of the screen, you can press ‘Win + Shift + S’ to use the Snipping Tool.
Compared to earlier versions like Windows 7 or 10, Microsoft has made screen capturing in the new update quite fast and smooth. Let’s go over all these tricks easily so that next time you won’t have to waste your time searching for the right Windows 11 screenshot shortcut.
Method 1: Capture the Full Screen with the ‘PrtScn’ Key (The Classic Way)
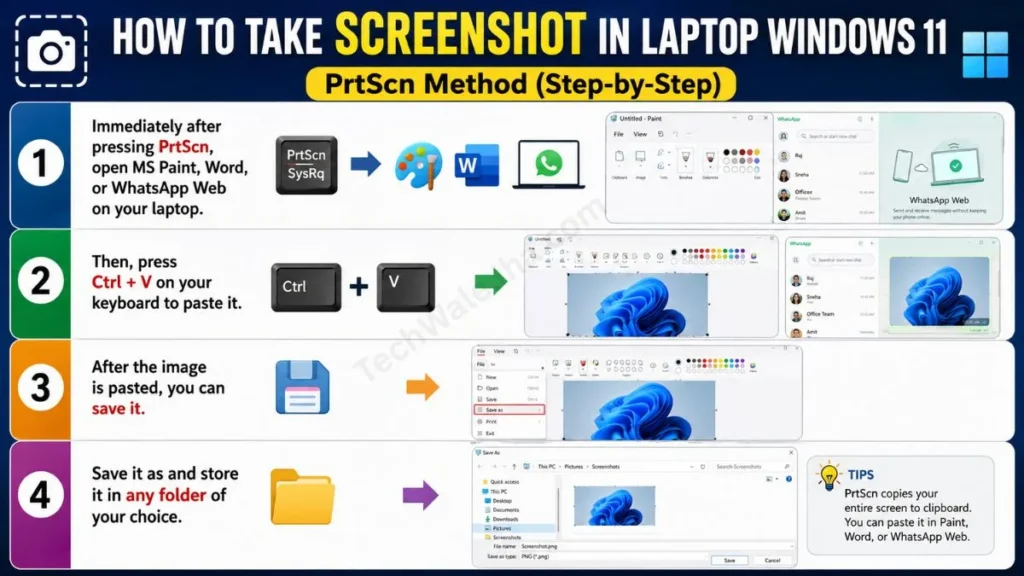
This is the oldest and most popular method for taking screenshots. If you want to capture your entire laptop screen in one shot, just press the PrtScn key on your keyboard once. And yes, on some laptops it’s labeled “Print Screen” or “PrtSc.”
But there’s a catch! Pressing this key alone doesn’t automatically save the photo to your folder. The image is copied to your laptop’s ‘Clipboard’ (temporary memory). To save it permanently, you’ll need to follow this small step:
- Immediately after pressing PrtScn, open MS Paint, Word, or WhatsApp Web on your laptop.
- Then, press Ctrl + V on your keyboard to paste it.
- After the image is pasted, you can save it as and store it in any folder of your choice.
This basic print screen Windows 11 trick is best for those who want to highlight or draw on a photo immediately after taking it.
Method 2: ‘Windows Key + PrtScn’ – Direct Auto-Save Trick
Suppose you’re watching a fast-paced live webinar or attending an online class. In such a case, repeatedly opening MS Paint and pasting the photo can be very boring and time-consuming. The most solid solution to this problem is this auto-save Windows 11 screenshot shortcut.
If you want the screenshot to save directly to your folder, try this method:
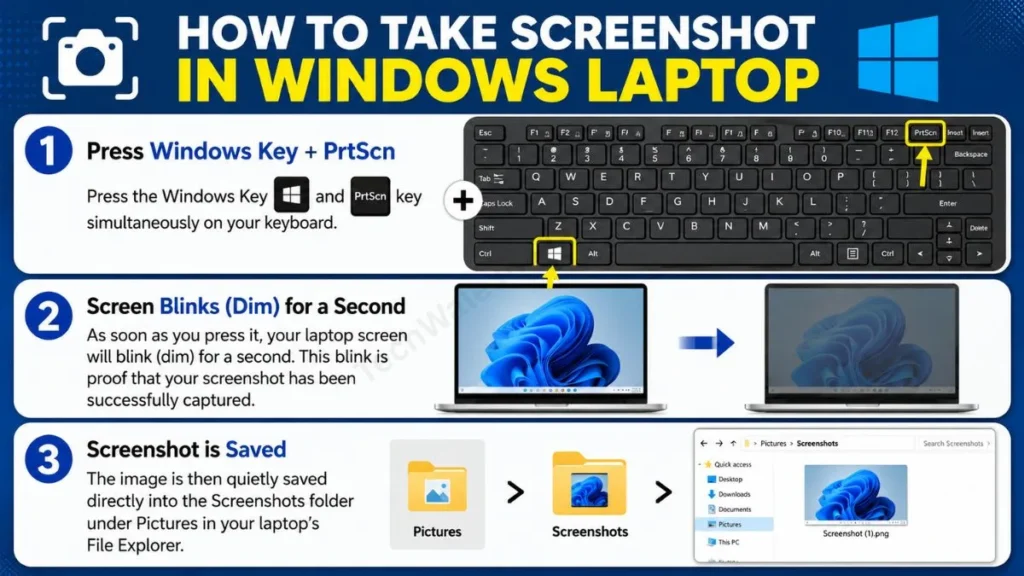
- Press the Windows Key and PrtScn key simultaneously on your keyboard.
- As soon as you press it, your laptop screen will blink (dim) for a second. This blink is proof that your screenshot has been successfully captured.
- The image is then quietly saved directly into the Screenshots folder under Pictures in your laptop’s File Explorer.
This method is a real time-saver when you need to take multiple screenshots quickly without stopping!
Method 3: Snipping Tool (Win + Shift + S) – The Most Powerful Way
If you don’t want a full-screen photo and are wondering how to crop screenshot on Windows 11 laptop directly while capturing it, then this trick is just for you.
Microsoft’s built-in snipping tool in Windows 11 has become much more advanced. To activate it, simply press the Win + Shift + S shortcut keys on your keyboard at the same time. As soon as you do this, your screen will dim slightly and a small menu bar will open at the top, where you will see 4 amazing options, which are:
- Rectangular Snip: Click and drag your mouse to create a box. This is the best way to take a partial screenshot in Windows 11.
- Free-form Snip: If you want to crop an image into a circular or irregular shape, use this.
- Window Snip: If you have a lot of things open in the background but only want to take a picture of a specific application like Chrome, click on that window.
- Full-screen Snip: This directly captures the entire screen.
As soon as you click, the photo will automatically be copied and a notification will appear on the right side. By clicking that notification, you can directly crop, highlight, or save the image.
Also read our other articles
- How to Repair a USB Flash Drive (2026 Quick Guide)
- How to Reset Any Application on Windows (2026 Quick Guide)
- How to Improve CPU Health: 5 Tips to Keep PC Fast
- How to Maintain Your Windows System (2026 Step-by-Step Guide)
Method 4: Xbox Game Bar (Windows Key + Alt + PrtScn)
If you’re playing a heavy game, or recording a screen where you don’t want the screen to dim (blink) and interrupt your work, then you can use the Xbox Game Bar screenshot feature.
To do this, simply press Windows Key + Alt + PrtScn on your keyboard. A screenshot of your active game or window will be quietly saved in the background, without any pop-ups or interruptions.
Where Are Screenshots Saved in Windows 11?
Many times, new users press the shortcut keys but then get confused, wondering, “where are screenshots saved in Windows 11?” Let’s completely clear up this confusion for you:
- If you used ‘Windows Key + PrtScn’, your screenshots are saved by default in the C:\Users[Your Username]\Pictures\Screenshots folder.
- If you used the Xbox Game Bar, the files will go into the Videos > Captures folder.
If you want to change the default location of these folders, or learn about the advanced settings of the Snipping tool, you can read Microsoft Support’s official Screen Capture guide directly. This official link will provide you with 100% accurate and safe technical steps from Microsoft.
Frequently Asked Questions
On some modern or compact laptops, the ‘PrtScn’ key is paired with the ‘Fn’ (Function) key. If pressing it directly doesn’t do anything, try pressing Fn + PrtScn together on your keyboard and try again.
How to take a screenshot without a keyboard shortcut?
If your keyboard is broken or some keys aren’t working, go to the Windows Search bar (Start Menu) and type “Snipping Tool.” Then, open this app, click ‘New,’ and easily capture your screen with your mouse.
Can I take a screenshot of long webpages while scrolling?
The built-in tool in Windows 11 doesn’t currently support scrolling screenshots. But if you want to capture a long webpage, you can use the Microsoft Edge browser’s built-in ‘Web Capture’ tool (Ctrl + Shift + S), which scrolls and saves the entire page at once.
Conclusion
Friends, whether you’re a student, an office employee, or a gamer, you must have understood by now how easy and flexible the process of “How to Take Screenshot in Laptop Windows 11” really is. If you want to work like a pro, my advice would be to get used to the Win + Shift + S shortcut, as it will really save you a lot of time.
I hope this guide was helpful for you! If you have any other tech questions, be sure to ask in the comments.




