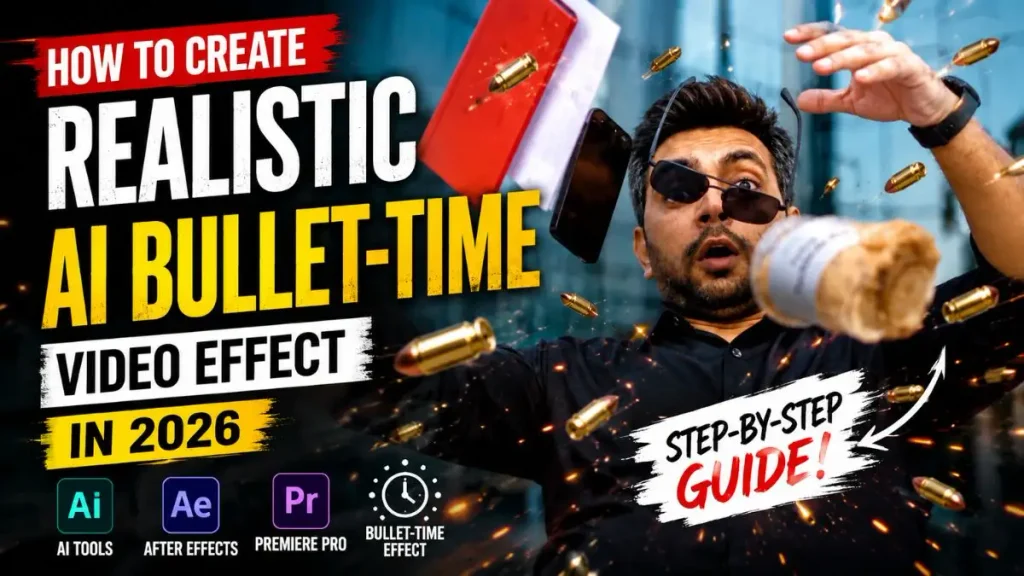
Friends, have you ever seen the “bullet-time” effect like in the movie The Matrix? These days, the trend of AI video effects is growing rapidly, and everyone wants to give their videos a cinematic look. I recently tried a realistic AI bullet-time Video effect, and the result was truly mind-blowing.
Previously, creating cinematic, frozen-in-time videos like this required hours of heavy video editing and VFX. But now, with the right AI workflow and precise prompts, you can easily recreate it.
In today’s post, I’ll walk you through the entire step-by-step workflow where we’ll be using GPT Image 2 and Seedance 2.5. You just have to copy these prompts, tweak them a bit to fit your style, and create your own viral AI video to post anywhere.
What is the AI Bullet-Time Video Effect? (The Matrix Magic)
If you’re wondering where this name came from, you have to remember the iconic 1999 Hollywood movie The Matrix. When Keanu Reeves (Neo) dodges bullets on the rooftop, time slows down dramatically and the camera smoothly circles around him. This cinematic technique is known worldwide as “Bullet Time.”
But friends, we’re now in 2026, and we no longer need an expensive setup of 100 cameras and green screens, because today’s viral AI video generation technology has become so powerful that AI algorithms can analyze a single 2D image and figure out its 3D depth and physics on their own.
When we use AI tools to create a perfect matrix slow-motion AI effect, three things are most important:
- Absolute Freeze: In this, the character’s actions like running, falling, flying, or anything else are brought to a complete halt.
- 360-Degree Camera Pan: The virtual AI camera smoothly pans around the character, following them from front to back or in all directions.
- Cinematic Depth: The background gently moves and remains blurred (bokeh), keeping the focus always on the subject.
But the secret to all this magic is just one thing: your base image and camera prompt.
Step 1: Create Your Character Sheet
First, we need to create a base design (character sheet) for our AI character. For this, you will need some basic reference photos of yourself or anyone else, such as:
- A selfie (For face and hair reference)
- A photo of your favorite outfit
- A photo of your sunglasses
After gathering all this, copy the GPT Image 2 prompt given below and go to ChatGPT to generate your photo:
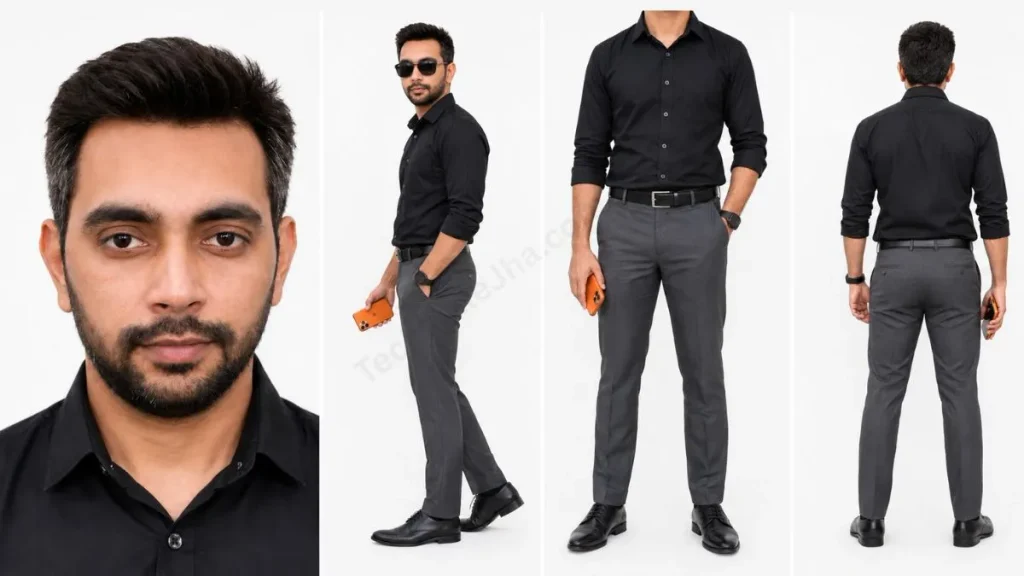
Full-body character reference sheet, seamless white background, soft and even studio lighting, and consistent representation of the character across all views. Face based on my reference selfie: same facial structure, features, and neutral expression in all panels, as well as the hair, which should be identical to the reference image.

Outfit: Take reference from the second image outfit, exactly Same styling And Fabric.

Accessories: Take the same sunglasses From The Third image reference.

Object: A Orange iPhone 17 Pro held naturally in one hand in the full-body views, clearly visible without obscuring the outfit.

No suits or costumes.

Panel order: The first panel is an extreme close-up of the face, very close to the face and occupying most of the frame. The second panel is a full-body profile view, from head to toe. The third panel is a front view framed from the neck down, with the head completely outside the frame, showing only the body and outfit. The fourth panel is a full-body back view, from head to toe.

Horizontal layout, with all four panels positioned side by side.
Step 2: Gather Character Materials
Once the character sheet is ready, gather some additional simple reference materials to make your character’s final look realistic. These are the objects that will play an important role in the video, such as:
- 🕶️ Sunglasses
- 📱 iPhone
- ☕ Coffee cup
- 👕 A nice outfit
These materials will help the AI with spatial continuity, ensuring that all these items remain in the correct place in the video.
Step 3: Animate with Seedance 2.5 (The Magic Step)
Now comes the most important and fun part! Once your character sheet and reference images are ready, upload them to Seedance 2.5. You can use it on Higgsfield, Magnific, Artlist, or Dreamina wherever you have a access.
I personally created this effect using Seedance 2.5 in Higgsfield.
Just copy the prompt given below. Note: Carefully place your reference images in the prompt at their correct positions (from <<<image_1>>> to <<<image_5>>>). If you don’t follow the sequence, the scenes in the video may appear out of order.
Vertical 9:16 format, continuous cinematic shot in one single take, photorealistic real-life image, realistic physics, and strong spatial continuity.
0.0–2.5 s: Begins at the feet of the main character from <<<image_1>>> walking naturally through the urban environment inspired by <<<image_2>>>. The camera smoothly tilts up along their body to a front close-up. The character holds <<<image_4>>> against one ear as if in conversation while naturally holding <<<image_5>>> in the other hand. <<<image_3>>> is worn naturally.
2.5–4.0 s: A rushed person approaches head-on carrying folders and loose papers, accidentally bumping into the main character. Papers scatter everywhere. The main character reacts with surprise, loses balance, and begins falling backward. <<<image_3>>>, <<<image_4>>>, and <<<image_5>>> separate clearly from the character due to the collision, following physically believable trajectories.
4.0–5.0 s: Time rapidly slows down into a dramatic bullet time effect. The character continues falling in extreme slow motion while the scattered papers and released objects remain suspended around them.
5.0–6.2 s: The camera moves closer to the suspended <<<image_3>>>. It remains nearly frozen in its natural position in space, with a shallow depth of field and the falling character smoothly visible in the background.
6.2–7.4 s: The camera pans across the same frozen scene toward <<<image_4>>>, visibly separated from the character. It preserves its exact appearance and displays its most recognizable front side toward the camera.
7.4–8.8 s: The camera pans toward <<<image_5>>>, suspended after being released from the character's hand. In extreme slow motion, any moving parts or contents react naturally to the impact according to the object's real physical build, maintaining realistic gravity, inertia, and material behavior.
8.8–10.2 s: The camera pulls back to reveal the full frozen scene once more: the character falling, papers floating everywhere, and the three reference objects occupying their natural positions in space.
10.2–11.2 s: Time abruptly snaps back to normal speed. Gravity and momentum resume simultaneously. The character, papers, and released objects drop naturally to the ground from their current positions.
11.2–13.0 s: After hitting the pavement, the main character briefly remains on the ground. Nearby pedestrians react with surprise and look over, creating a natural aftermath moment before the shot ends.
Throughout the sequence, maintain the exact appearance of each reference object. All must originate from the character and separate visibly during collision—never appearing spontaneously. During bullet time, objects remain anchored in space while the camera travels to them for close-ups. No duplicates, no teleportation, and no objects flying into the lens. Premium fashion film cinematography, realistic materials, natural lighting, shallow depth of field, and practical high-speed photography feel.
Live Demo: Watch the AI Bullet-Time Effect in Action!
Final Thoughts
So friends, by following this simple AI workflow, you can create a Hollywood-style cinematic and realistic bullet-time video. You can also tweak these prompts to change the scenes and camera angles according to your creativity.
If you make your own video using this tutorial, be sure to tag me @TechWaleJha! I’d be really happy to see your creativity.
For more amazing AI tools and tech tutorials like this, stay tuned to TechWaleJha!
What did you think of this tutorial? Be sure to let me know in the comments!